Creating A Living Medical Illustration | Body Art 101
by A.D. Cook
Published in Airbrush Action Magazine, December 2001
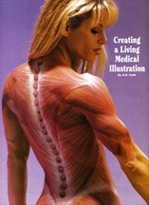
A unique and fun project has presented itself, creating a living medical illustration. We wanted to create a series of photographs where the model has the illusion of not having any skin. We’ve done this before with a male model, but today I’m working with Tanya Schrock as our adventurous subject, and photographer Del Munroe to create a slightly more abstract approach.
Our goal is simple here, so too is the actual painting process. Because we’re covering a lot of the body it will take some time to complete. Painting Tanya’s torso, from the neck the area to just above the knees, took about three to four hours.
Before getting into the actual step-by-step process of preparing and painting a subject, we’ll cover the important first step of finding and working with a model.
Finding a Model
Aside from figuring out what you want to paint, probably the hardest part of working in body art is finding a good and willing model. The two don’t necessarily go hand-in-hand. A good model is someone with good skin, a good attitude, and a lot of patience. Sometimes it can take hours to complete a body-art project. It’s as much work for the model as it is for the artist to pull off a successful project. Finding a willing model is a whole different issue. I’ve been pretty lucky in this area, finding fantastic models without too much effort. I’ve found willing models through the local artists’ model guild, friends of photographers, and dancers. Ultimately, you’ll want to find someone who is comfortable with their body and being painted. The project gets increasingly harder if the model is uncomfortable being unclothed around others, especially strangers.
If you have a hard time finding a good and willing model that meets your criteria, call a couple of life drawing studios for a referral.
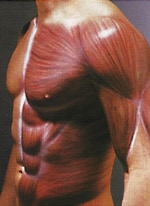
Sometimes a referral goes a long way in finding the right participant for the project at hand. I’ve put out the word to friends who know my work that I’m always looking for models to paint. Photographers in the area have referred some models to me. Other times, models refer other models to me. Regardless of where they come from, who referred them, or what they do, the best (and only) way to treat your model is with respect. Be professional and a model will not only work with you, but they may also refer to other models they know. Some of our best models have been waiters/waitresses, fitness trainers (as in Tanya’s case), or dancers. Tanya is perfect for this project. She’s a very committed bodybuilder and dancer. She’s really ripped. When she flexes you see muscle. This made my part a lot easier. It eliminated much of the guesswork, which aided in pulling off the illusion of being pure muscle.
In addition to you and your model, a photographer, and possibly an assistant or two may also be present. If that’s the case, inform your model beforehand that others will be there, and what their roles are. Speaking of comfort, if your model is going to be standing for a while you may want to have a piece of carpet for them to stand on, and a comfortable chair. Keep plenty of fresh drinking water around and find out what food or snacks will be needed. It’s not like you and your model can break for lunch. Also, have a couple of spray masks around in case your model feels they need one. I try to keep a few of those medical-style masks available. While the paint is non-toxic, some people are sensitive to the lingering over-spray. A good general rule of thumb is if the model is comfortable they’ll be easier to work with, and everyone will have more fun as a result.
An Understanding with Model and Photographer
A word of caution here, if you’re going to do body art and photographs are going to be taken, get a Model Release form signed and make sure the model knows that photos may be reproduced at some point. If you’re working with a photographer, it’s also a good idea to talk with him/her to establish how the images will be used and who owns them. Without that discussion, copyright and usage issues may later arise. It’s better to cover these concerns upfront before everyone invests a lot of time and energy.
Reference Material
Before starting this project, or any project for that matter, I try to gather as much reference material as possible. With a quick visit to the local bookstore, I was able to find some great books on the muscle structure of the human body. There are a lot of good anatomy books and medical reference books available. The Internet is also a valuable source of good reference material. This reference material was essential in being able to reasonably create the illusion of muscle. Without good reference material, you’ll be guessing what it’s supposed to look like. Whether you’re painting your model to look like a muscle, as we are here, or like a tiger, or whatever, take the time to do a little research before you start painting so you can create a convincing illusion.
Step 1 – Prepping the Surface
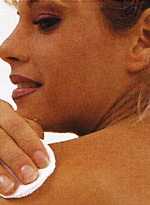
The first step is to wipe down the model’s skin with Isopropyl Alcohol, cleaning it thoroughly and removing any body oils, make-up, and sweat, or contaminates. Even if your model has just showered, they’ll need to be wiped down on the areas you intend to paint. Using cotton pads, thoroughly clean the skin, and allow the Isopropyl Alcohol to evaporate dry. Warn your model in advance that the Alcohol is usually cold. Continue to clean the skin until the pads look clean after you’ve gone over your subject a couple of times. You’ll want to clean all the areas you intend to paint at this point. For certain areas, it may be best to let your model clean for you. A lot of that will be dictated by your relationship with the model and the areas you intend to paint. Once clean, your model is ready.
Step 2 – Under-painting with White
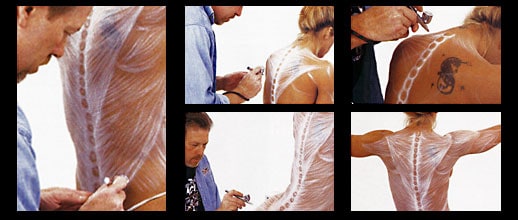
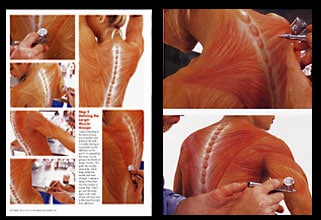
Using an Iwata HP-C airbrush, and Artool Body of Art Airbrush Body Paints, I start by defining the general muscle structure with white, covering any skin blemishes, and in this case, tattoos. This entire project is all done freehand, so no templates or masking will be required. At this point, I’m trying to establish blocks of muscle groups and get a general feel for where the muscles actually are. Exact detail is not critical. I’ll be going over all the areas a few times building color. Do the complete body using white before moving on to other colors. It’s critically important here to go for symmetry. You’ll want each side of the body to look as similar to the other as possible. Keep your reference materials close and refer to them often.
Step 3 – Golden Yellows
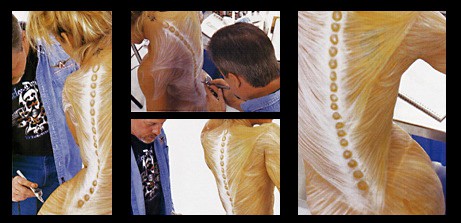
Using yellow mixed with a touch of red [I’m looking for a golden yellow color here], I continue to develop the muscle layout. In essence, I’m covering the white with layers of rich flesh-like tone. This helps to unify the overall skin color and defines the muscles as well. As I spray I’m careful not to hide the white entirely. Some areas, mainly tendons, and the details along the spine are going to remain a nice white by the time the project is complete.
Step 4 – The Warmth of Reds
Henna Brown mixed with red, and some of the Golden Yellow we mixed earlier, is used to define the muscle groups. A flesh-like tone is starting to reveal itself (no pun intended) as I build the layers up slowly. Again, I’m deliberately avoiding spraying the areas that will remain white.
Step 5 – Defining the Larger Muscle Groups
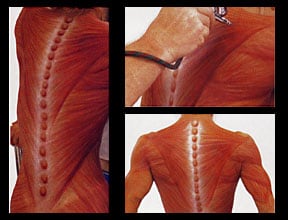
A little blue is added to the previous color mix of Henna Brown to darken and enhance the reds. I’m really starting to define muscle definition at this point. I’m separating the major muscle groups into blocks of larger muscles. This gives the muscles some bulk, which helps to make the model appear even stronger. A lot of fine lines are also interwoven into the muscles to create the fiber. I go over the body again with violet mixed with blue and a little black for even finer definition.
Step 6 – Details in White
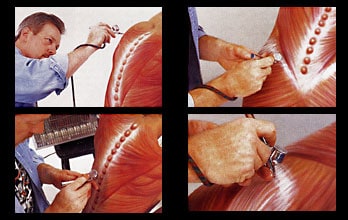
White is used once again to highlight and define the tendon areas and separate muscle groups even further. I’ve taken the opportunity here to eliminate our model’s bikini line around the waist as well. These steps finalize the detail and also clean up any over-spray from the previous colors. The painting part of this project is now complete.
Step 7 – Talc the Finished Work
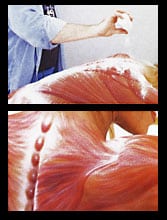
After allowing a few minutes for the paint to thoroughly dry, our model is lightly covered with talc powder to even out the color. Baby powder can also be used if your model prefers. This last step takes the sheen, or gloss, out of the paint. When the talc is first applied, it’ll look like all your paint has faded away. Don’t worry, after a few minutes, the paint will appear brighter, without the glossy look.
The talc also helps to set the paint, so if your model wants to wear the finished art for a few hours, or even a couple days, it’ll last longer. Tanya later expressed to me that she got quite a reaction from those that she showed it to after the photoshoot.
In Conclusion
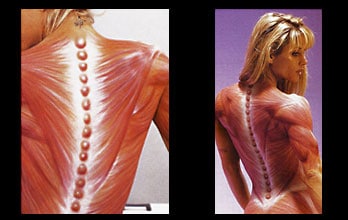
Look’s pretty easy, eh? When you’re doing body art, a lot of times it’s just a matter of keeping it simple, not overworking it, and relying on that reference material I talked about earlier. Fortunately, this is one of those endeavors where the practice is actually enjoyable.
Most of all, remember this is supposed to be fun – for everyone. Enjoy.
- About the Author
- Latest Posts
- More info
A.D. is an artist who started drawing at a young age. Throughout his life, he has worked with different creative tools in traditional and digital art and design. His art and writings have been showcased in various publications such as Airbrush Action Magazine, Airbrush Magazine, American Art Collector, Art & Beyond, Dream To Launch, Easyriders, Las Vegas City Life, Las Vegas Weekly, L’Vegue, ModelsMania, Quick Throttle, and The Ultimate Airbrush Handbook.

